

Ask a Professional: How to Wire a 66 Block for Your Home
February 2nd, 2023 by admin
Wiring a 66 block is one of the most challenging wiring jobs you'll ever encounter as a home remodeling contractor, but it's also one of the most rewarding. With an experienced hand, this job can be finished in a single day and left as clean as you found it. If you have the patience for meticulous detail and intuitive problem solving, then you'll love tackling this project. This blog post highlights our top tips for wiring a 66 block and avoiding common issues along the way. Follow these easy instructions to finish your inside wiring job smoothly, >efficiently, and without risk of fire or damage to your house...
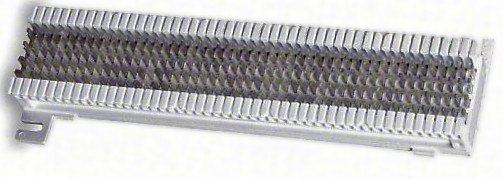
What is a 66 block?
The 66 block is a type of wiring unit/outlet that's used in a home's single-family residence wiring. In this article, we'll show you step-by-step how to wire a 66 block, but in case you're not familiar with the block's distinctive design, here's a brief explanation. The 66 block is a single-outlet version of the three-outlet electrical service panel. It has the same shape, but a smaller number of slots (66 vs. 82). This makes it easier to install in a variety of wall heights and locations.
Wire Up a 66 Block from Scratch
Like installing any other circuit, wiring up a new electrical service will require some planning. This includes figuring out where you'll run the new wires, deciding upon the right circuit breaker or circuit protection device, and selecting the right circuit wiring for your new circuit. With the right tools, you can wire up a 66 block from scratch. However, it's much easier to install new electrical wiring if it's part of a complete remodeling job. This will save you a lot of time and hassle, as you won't have to deal with the complexity of a brand-new wiring job.
Check with Old wiring for Shorter Paths
While it's tempting to wire a new outlet to whatever circuit it's replacing, this, in general, is a bad idea. Newer wiring codes require that the new wires are under longer-distance service, so they've got to be marked. If the old, shorter path is still in place, then the new wires will be spliced into it. That's not only a waste of time and materials, but it's also a safety hazard too. Don't risk it. Call the electric company and have them send the new circuit wire on a new route.
Install New Wiring for Dimmer Switches
If you wired a new outlet to the same circuit as the previous outlet, then the dimmer switch will stop working. This means you won't get any light where you want it. This is a simple fix, but it's easy to forget when you're focusing on wiring up new outlets. Before you install the dimmer wiring, you'll need to add one more new wire to the circuit you wired for the new outlet. This will allow you to connect the new dimmer switch to the circuit.
Don't Forget to Connect the New Wiring to the Outlets and Switches
Test the circuit regularly, even after you've finished wiring up the circuit. This includes testing the outlets and switches regularly, checking for short circuits, and testing the wiring to make sure there are no damage and no exposed wires. If you forgot to connect the new wires to the outlets or switches, so that's a fire hazard. Call the electric company immediately and have them come to fix the problem.
Final Steps: Putty and Paint
Once the wiring job is finished, be sure to clean up and cover any wires in each conduit. Any dust or dirt in the conduit will accumulate inside your walls and floors, posing a serious health risk. If you painted the walls, be sure to paint over the conduit. If you used conduits with plastic covers, then also be sure to clean them off with a damp rag. If you've finished up the wiring job, then you'll be ready for the final step: Puttying and painting the walls, floors, and ceilings. This will give your remodeling job a polished, finished look. These are only a few tips for wiring a 66 block. If you follow them, then you'll have a much smoother, safer, and more efficient wiring job rather than wiring the block from scratch.
Still Confused?
Don't worry! You can always contact us in case you need an experienced tech to come out and finish the job done. ATEL Communications is your one-stop-shop for all your inside wiring needs. Call us today for a free estimate at 858-646-4600.
Posted in: Services